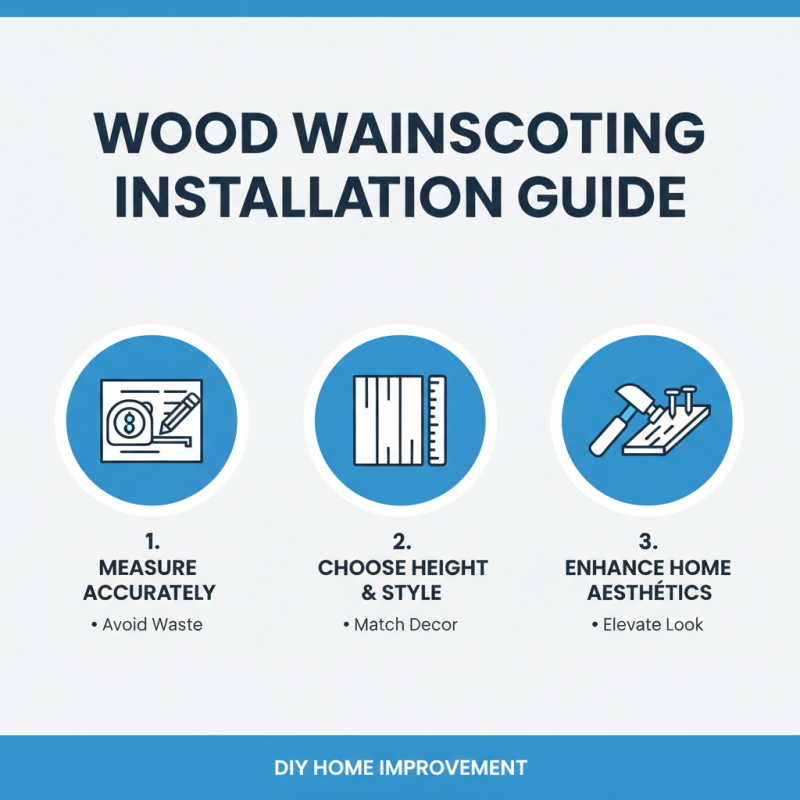
2026 How to Install Wood Wainscoting in Your Home?
Wood wainscoting adds elegance and character to any home. Its warm, rich texture transforms bare walls into stunning focal points. In this guide, we’ll explore how to install wood wainscoting effectively.
Choosing the right wood is crucial. Different types, like oak or pine, offer varied appearances and durability. You’ll want to visualize how each option complements your existing decor. Proper measurement is vital too, as inaccurate cuts can lead to frustrating outcomes.
Installing wood wainscoting can feel daunting. Mistakes are common, but they provide learning opportunities. Embrace the process and assess the areas that require extra attention. With patience and determination, you’ll create a beautiful wood wainscoting design that enhances your home’s aesthetic.
Understanding Wood Wainscoting: Types and Styles to Choose From
Wood wainscoting adds elegance and warmth to any home. It involves decorative panels applied to the lower portion of walls. Various types are available, offering distinct styles for homeowners.
The most common types include raised panel, flat panel, and beadboard wainscoting. Raised panel wainscoting features three-dimensional panels that create a classic look. In contrast, flat panel designs give a modern flair. Beadboard adds texture with narrow strips. Each type can transform a space dramatically.
Choosing the right style can be overwhelming. Factors such as room dimensions and existing decor play a role. The National Association of Home Builders indicates that wainscoting can increase home value by up to 10%. This makes it a worthwhile investment. However, some may find it challenging to install correctly. Misalignment can ruin the aesthetic. Precision is key, and homeowners should not rush the process. Taking time to measure accurately will yield better results.
Gathering Necessary Tools and Materials for Installation
To successfully install wood wainscoting, you must gather essential tools and materials. Measurement tools are crucial. A good quality tape measure ensures accurate cuts. Additionally, you need a level to check if your wainscoting sits straight against the wall. According to a 2021 report by the National Wood Wainscoting Association, improper measurements lead to over 30% of installation errors. So, take time to measure twice.
Your material selection is equally important. Choose quality wood that suits your home design. Common options include pine, oak, or maple, each offering different aesthetics and durability. Notably, a study showed that oak wainscoting can increase home value by up to 15%. Remember, not all woods handle moisture the same way. Consider your installation environment to avoid warping.
Tips: Before starting, sketch your layout. Visualizing can help avoid mistakes. Use a stud finder to locate wall studs. This ensures your wainscoting is securely attached. Also, allow your wood to acclimate in your home for three days. This step helps reduce future expansion issues. Understanding these details will make the process smoother, but always be ready to adapt. Imperfections can happen. Embrace those moments as learning opportunities.
Wood Wainscoting Installation Guide
Measuring and Preparing Walls for Wainscoting Installation
Measuring and preparing walls for wainscoting installation is crucial. Start by assessing the walls in the chosen room. Look for any imperfections or damage that might affect the installation. Clean the surface thoroughly to ensure the wainscoting adheres properly. It’s also important to check for moisture issues, as these can lead to bigger problems later on.
Once the walls are clean, measure the height where the wainscoting will go. A standard height is about one-third of the wall, but you can adjust based on your preference. Use a level to mark a straight line across the wall. This was a challenge for me in my last project. I accidentally marked it at the wrong height. It’s essential to double-check your measurements to avoid mistakes.
Next, clear any furniture away from the walls. This often means moving heavy items, which can be a hassle. But ensuring a clear workspace will make the installation smoother. Use a stud finder to locate the studs in the wall. These will give you a solid base for attaching the wainscoting. Missing the studs can lead to a less secure fit, and that’s not what you want. Take your time with these preparatory steps. They set the stage for a successful installation.
Finishing Touches: Painting and Sealing Your Wainscoting
Painting and sealing your wood wainscoting can elevate its overall appearance. Start with a good quality primer. This step is crucial. It helps the paint adhere properly. Once dried, choose a color that complements your room's theme. Light shades can brighten a space. Dark colors add warmth and character. Use a high-quality paintbrush for even application. Avoid cheap brushes; they can leave streaks.
Sealing the wainscoting is equally important. A clear sealant protects the wood from moisture and wear. Apply it carefully, ensuring full coverage. You might consider semi-gloss or satin finishes for added durability. Don’t rush this part. Allow each coat to dry properly. It can take time but it’s worth it. Mistakes can happen. If brush marks or drips appear, sand lightly and repaint.
Remember, the process doesn't need to be perfect. Embrace the unique marks that come with DIY efforts. They tell a story of your personal touch. Don't fret over every blemish; they can enhance the charm of your wainscoting. Enjoy the journey of making your space truly yours.
2026 How to Install Wood Wainscoting in Your Home? - Finishing Touches: Painting and Sealing Your Wainscoting
| Step |
Description |
Tools Required |
Materials Required |
Duration |
| 1 |
Measure the Area |
Tape Measure |
None |
1 Hour |
| 2 |
Cut the Panels |
Miter Saw |
Wood Panels |
2 Hours |
| 3 |
Install the Panels |
Nail Gun |
Adhesive, Nails |
3 Hours |
| 4 |
Fill Gaps and Holes |
Putty Knife |
Wood Filler |
1 Hour |
| 5 |
Sand the Surface |
Sander |
Sandpaper |
2 Hours |
| 6 |
Paint and Seal |
Brush, Roller |
Paint, Sealant |
4 Hours |