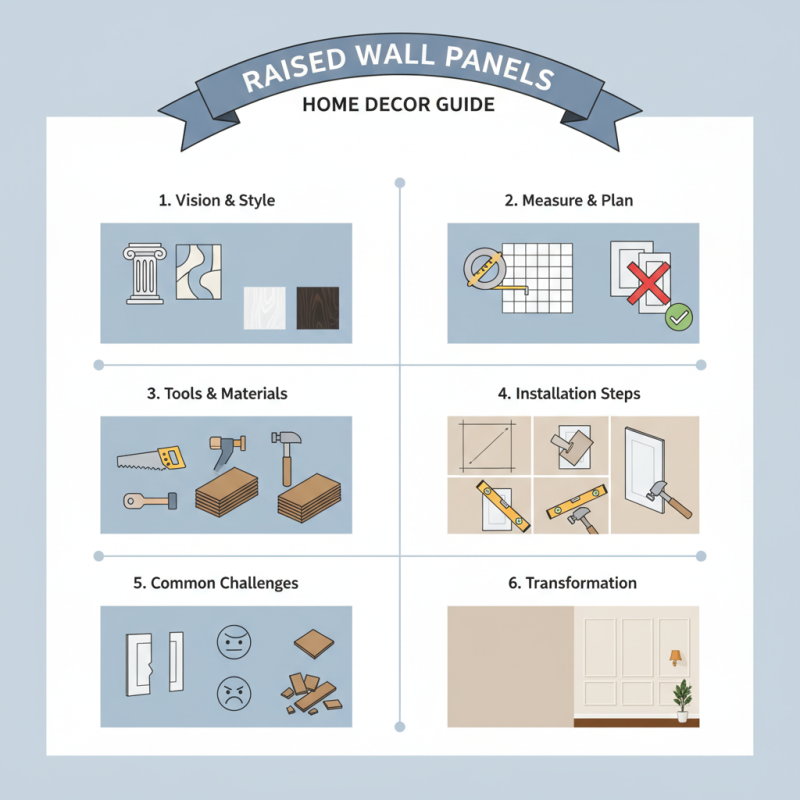
How to Install Raised Wall Panels for Your Home Decor?
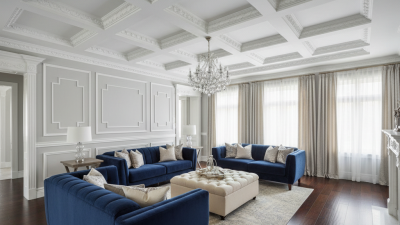
If you're looking to elevate your home's aesthetic, installing raised wall panels is a brilliant choice. According to Michael Johnson, a leading expert in interior design, "Raised wall panels can transform a plain room into a space filled with character." These panels not only enhance visual interest but also add texture to your walls.
Choosing the right design is crucial. You can opt for classic styles or more modern interpretations. Consider the color and finish carefully. For instance, white panels offer a clean look, while dark wood adds warmth. However, be cautious; improper installation can lead to uneven surfaces and gaps.
When embarking on this journey, prepare for challenges. It’s essential to measure accurately before cutting. Mistakes can lead to wasted materials and frustration. As you proceed, keep in mind that your vision may evolve. Be flexible and open to adjustments to achieve the best outcome. With dedication, raised wall panels can significantly enhance your home decor.
Choosing the Right Raised Wall Panels for Your Space
When choosing the right raised wall panels for your space, start by considering your room's overall theme. Are you going for a modern look or something more traditional? Panels come in various styles, and the right choice can significantly impact the room’s vibe. Think about textures too; smooth finishes can make a space feel sleek, while textured surfaces add warmth and character.
Size matters as well. Large panels can create a dramatic effect in spacious rooms, but be careful in smaller areas. They can overwhelm the space and feel claustrophobic. You might also want to play with color. Lighter shades can open up a room, while dark colors add intimacy. Take your time to visualize how the colors and textures will work together.
Don’t forget about practical considerations like maintenance. Some materials require more upkeep than others. This is where reflection is key. Are you ready to put in the work? Sometimes, the perfect panel can become a burden if it doesn't suit your lifestyle. Consider all these factors carefully before making a final decision.
Preparing Your Walls for Installation of Raised Wall Panels
Preparing your walls for raised wall panels is an essential step in the installation process. Begin by removing any decorative items or furniture that may obstruct your workspace. Ensure that the wall surfaces are clean and free of dust. Mild soap and water can do the trick here. Peeling paint or old wallpaper should also be addressed. It’s tempting to leave these behind, but they could ruin your new panels.
Next, inspect the wall for damage. Look for cracks or holes that need filling. You’ll want a smooth surface for the best finish. Consider that uneven or rough areas could cause the panels to look misaligned. A quick patch job may seem sufficient, but be thorough. Allow any repairs to dry completely. Check your measurements twice before marking where the panels will go. It's a simple mistake, but miscalculating can lead to uneven rows. Use a level to ensure your markings are straight. This attention to detail can make your installation much more rewarding.
How to Install Raised Wall Panels for Your Home Decor? - Preparing Your Walls for Installation of Raised Wall Panels
| Dimension |
Description |
| Material |
Medium-density fiberboard (MDF), Plywood, or Solid Wood |
| Preparation Time |
2-3 hours for measurement and wall preparation |
| Installation Time |
4-6 hours depending on the room size |
| Tools Needed |
Saw, Level, Nail Gun, Hammer, Measuring Tape |
| Cost Estimation |
$500 - $2000 depending on materials and labor |
| Finish Options |
Paint, Stain, Veneer, Wallpaper |
Tools and Materials Needed for Installing Raised Wall Panels
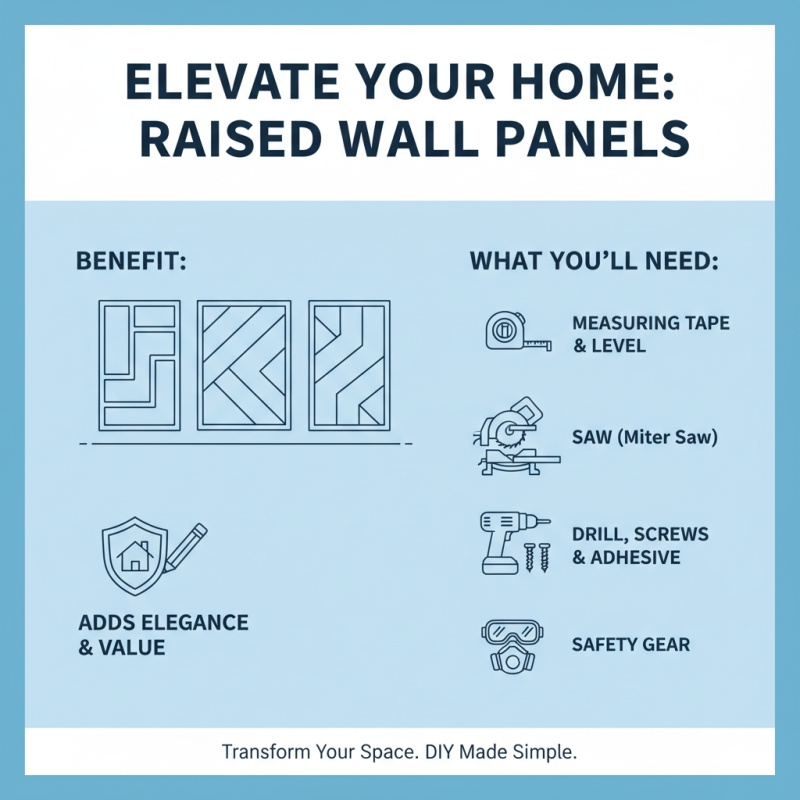
Installing raised wall panels can add elegance to your home. To start, gather essential tools and materials. You will need a measuring tape, level, and a saw. A miter saw is ideal for precise cuts. You also require a drill, screws, and adhesive for secure attachment. Safety goggles and a dust mask are a must for protection.
As for materials, select your preferred wood or MDF panels. Paint or stain can enhance their appearance. Use wood caulk for gaps and extra finishing touches. A sturdy work table will help with assembly. Ensure your wall surface is clean and dry before installation. Measure twice to avoid costly mistakes.
It might seem easy, but don’t rush. Patience is important for alignment. Sometimes panels don’t fit perfectly, which is frustrating. If adjustments are needed, take a step back. Measure again and make the necessary edits. Reflect on your work regularly to ensure everything aligns as planned.
Step-by-Step Installation Process for Raised Wall Panels
Installing raised wall panels can significantly enhance your home decor. The process involves several clear steps. Begin by gathering your materials—panels, adhesive, and tools. According to the National Kitchen and Bath Association, well-planned decor can boost a home's value by up to 15%. This is worth considering when deciding on installations.
Measure your wall space accurately. This step cannot be overstated. If your measurements are off, the panels will not fit perfectly. Use a level to mark where the panels will go. Inconsistent measurements could lead to uneven panels, which might bother the eye. Secure the panels using the adhesive, but ensure you check for any misalignment before the glue sets.
Finishing touches matter as well. Fill any gaps with caulk to ensure a seamless look. HomeAdvisor notes that texture and paint can help blend raised panels into the walls. It’s essential to be patient and thorough during this stage. Rushing may lead to a patchy finish. Remember, an imperfect installation might diminish the aesthetic appeal you aim to achieve.
Finishing Touches and Maintenance Tips for Your Wall Panels
When installing raised wall panels, finishing touches can make a big difference. After securing the panels, focus on the edges. Use caulk to fill gaps. This prevents dust buildup and creates a polished look. Ensure that the caulk matches your wall color for a seamless transition. A fresh coat of paint might be needed. Don't rush this step; take your time for even coverage.
Regular maintenance is also essential. Dust the panels frequently with a soft cloth. For deeper cleaning, use a damp cloth and a mild detergent. Avoid harsh chemicals; they can damage the finish. Over time, wood panels can warp or crack. If you notice any imperfections, address them early. A little effort can help maintain their appearance and durability. Keeping your wall panels looking fresh requires ongoing care.
Raised Wall Panels Installation Trends
This bar chart represents the trend of raised wall panel installations from 2019 to 2023, highlighting the growing popularity of this home decor choice.