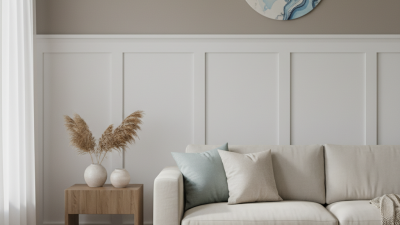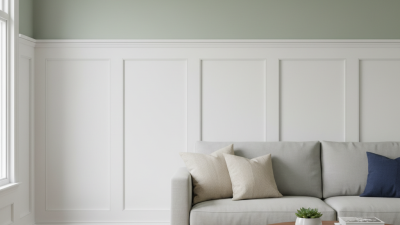


Flat panel wainscoting is a wall treatment made from broad, flat panels framed by narrow stiles and rails. It usually covers the lower section of a wall, though full-height installations are possible. The result is quieter than raised-panel millwork: clean rectangles, crisp shadow lines, and a more tailored finish. In a hallway, it can frame a narrow console; beside a dining table, it gives the wall visual structure. Proportions matter. Panels that are too small can make a room feel busy.
Home renovation remains a major part of residential spending. Harvard’s Joint Center for Housing Studies, in its 2023 Leading Indicator of Remodeling Activity, forecast $485 billion in homeowner improvement and repair spending for that year. The report measures the wider remodeling market, not wainscoting specifically. That distinction matters: broad renovation figures cannot prove that one wall detail adds value. They do show why durable, well-planned finishes deserve careful consideration.
Design reformer William Morris offered a useful test: “Have nothing in your houses that you do not know to be useful, or believe to be beautiful.” For flat panel wainscoting, that means choosing a height, panel width, and paint finish that suit the room rather than copying a showroom. A practical note: I could not verify a verbatim statement from a named wainscoting specialist about this exact style, so I won’t invent one. The details still reward scrutiny. Check corners, seams, and outlet placement before installation; even a well-painted panel can look awkward when those small decisions are rushed.
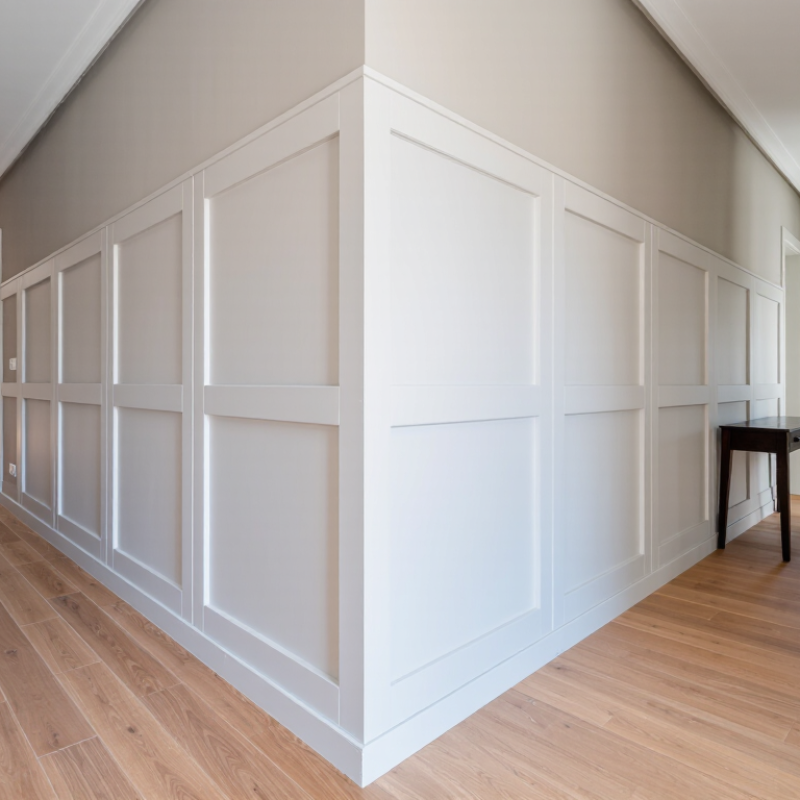
Flat panel wainscoting is wall trim built around smooth, flat panels. Narrow vertical stiles and horizontal rails frame each panel, creating a tidy grid across the lower wall. Unlike raised-panel designs, its center surfaces sit flush or slightly recessed, with little sculpted detail. The result feels calm and architectural. Simple lines matter.
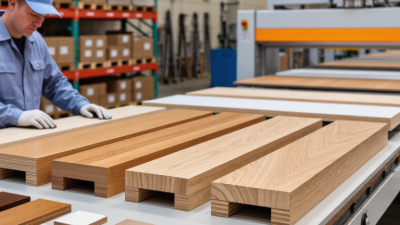
Common materials include painted wood, medium-density fiberboard, and moisture-resistant boards suited to specific rooms. The rails and stiles give the panels structure, while the broad, plain centers keep the pattern from feeling busy. Installers usually measure each wall and plan panel widths around corners, doors, and outlets. Small spacing differences can stand out, especially under bright side lighting.
Wainscoting can help protect a wall from chair backs, bags, and everyday scuffs, though it is not a substitute for waterproofing. A practical height often relates to the room and existing trim, rather than a fixed rule. On uneven walls, even careful fitting may leave slight variations. That is worth noticing. Paint can soften those flaws, but it cannot correct poor alignment. A clear finish, crisp joints, and suitable material help the paneling look intentional.
What Is Flat Panel Wainscoting?
Main Components and Panel Designs
Flat-panel wainscoting covers the lower part of a wall with a clean, framed surface. Its main components are vertical stiles, horizontal rails, flat center panels, a baseboard, and a top cap or chair rail. The frame holds each panel in place, while the baseboard and cap finish the edges. Some systems attach directly to the wall; others use a backing layer. That choice affects installation depth and how the trim meets doors and windows.
Panel layouts shape the look. Equal-width rectangles feel orderly, while wider central panels create a quieter, less formal rhythm. Square panels can suit compact rooms, but long rectangles often work better beneath tall ceilings. Keep spacing consistent, and check the layout against outlets, corners, and furniture before cutting. Real walls are rarely perfectly straight. A small gap can still show.
Material and labor costs vary by region and finish. The 2024 U.S. Houzz & Home Study reported a $24,000 median spend among U.S. homeowners who renovated in 2023. That figure covers home renovations broadly, not wainscoting specifically, so use it only as general planning context. For a reliable estimate, measure the wall sections and confirm panel dimensions with an experienced trim professional. Heights that look right on paper can feel awkward beside a nearby window.
An illustrative 34-inch wainscoting layout showing the main components and their example vertical dimensions.
Flat panel wainscoting typically combines a baseboard, lower rail, recessed or flat panel area, upper rail, and cap. These measurements are an example, not a fixed standard; actual dimensions vary with the wall and design.
What Is Flat Panel Wainscoting?
Materials and Finish Options
Flat-panel wainscoting pairs recessed or applied flat panels with simple rails and stiles. The material shapes its feel. Medium-density fiberboard (MDF) offers a smooth face for painted finishes and crisp edges. Plywood is lighter and shows natural grain beneath clear coats. Solid wood brings visible grain, but seasonal humidity can make joints shift. Small differences matter.
For bathrooms or damp entryways, check the panel’s moisture rating and the coating instructions. Standard MDF can swell if water reaches cut edges. Primed panels save preparation time, while unfinished stock allows custom color matching. A sample chip can still mislead: sheen and wall lighting change how a finish reads across a full room. Test a larger sample near the floor and window.
Finish choice affects indoor air, too. The U.S. Environmental Protection Agency notes that indoor concentrations of some volatile organic compounds can be up to ten times outdoor levels. Low-emission paints and clear coats may help limit added emissions, though labels and testing standards differ. Matte paint softens glare but marks more easily; satin is simpler to wipe clean. Check cure times before moving furniture back.
What Is Flat Panel Wainscoting?
How Flat Panel Wainscoting Is Installed
Flat panel wainscoting uses recessed, flat sections framed by narrow rails and stiles. Installation begins with a careful wall check. Measure the desired height, locate studs, and mark a level reference line around the room. Floors often slope slightly. Trust the level, not the baseboard.
Cut the rails and stiles to fit, then dry-fit each section before fastening. Secure framing into studs where possible, using suitable nails or screws and construction adhesive when appropriate. Fit panels into their frames according to the material’s installation instructions. Leave any required movement gaps; solid wood can shift with humidity. Check every joint as you work. A small gap can become obvious under paint.
Houzz’s 2024 U.S. Renovation Trends Study reported a $24,000 median renovation spend in 2023, up from $22,000 in 2022. That figure covers many project types, but it underscores why accurate measuring matters. Finish by attaching the cap rail and base trim, filling fastener holes, and caulking trim edges. Avoid hiding uneven joints with excess caulk. They may still show. Paint after the filler and caulk have cured, and inspect the wall in side lighting. That last check can reveal flaws you missed.
| Stage | What It Involves | Typical Dimensions or Layout | Materials and Tools | Installation Guidance |
|---|---|---|---|---|
| Understanding the style | Flat panel wainscoting is lower-wall trim made from flat, recessed-looking panels framed by vertical stiles and horizontal rails. | Often covers roughly the lower third of a wall; the finished height commonly falls around 32–42 inches, including the baseboard. | Flat sheet panels or wall boards, stiles, rails, baseboard, and optional top cap or chair rail. | It creates a clean, framed-panel appearance. The finished height and trim profile should suit the room and existing doors, windows, and furniture. |
| Planning the layout | Measure each wall, mark the proposed top height, and divide the wall into balanced panel sections. | Panel widths vary with the wall length. Keep stile spacing consistent where possible and account for corners, doors, outlets, and other obstructions. | Tape measure, pencil, level, stud finder, and a simple wall-layout sketch. | Measure the actual wall rather than relying on nominal room dimensions. Adjust the end panels so narrow slivers are avoided. |
| Preparing the wall | Remove or work around existing trim as needed; repair loose material and mark stud locations. | Check the full wall for bumps, gaps, and changes in floor level before setting a level reference line. | Level, stud finder, pry bar, filler, sandpaper, and cleaning cloth. | A level line is more reliable than measuring up from an uneven floor at every point. Follow safe procedures when working near electrical outlets. |
| Installing the base and panels | Fit the baseboard, then cut and attach the flat panel sections according to the planned layout. | Baseboards around 4–7 inches high are common, but existing trim and the chosen overall wainscot height determine the fit. | Panels suitable for interior use, saw, construction adhesive where appropriate, finish nails, and nail set. | Dry-fit pieces before fastening. Use an appropriate fastening method for the wall construction, and leave material expansion gaps where required by the panel manufacturer. |
| Adding rails and stiles | Install vertical stiles between the rails to frame each flat panel and create a regular rhythm. | Rail and stile widths are often about 2½–4 inches, but the proportions should be chosen to fit the panel size and room scale. | Trim stock, miter saw, level, measuring tools, adhesive, and finish nails. | Keep stiles plumb and rails level. Fasten trim securely, aiming for studs when practical, and check each joint as the assembly progresses. |
| Finishing the top edge | Cap the assembly with a top rail or chair rail for a finished transition to the exposed wall. | A top trim piece is commonly about 2–4 inches wide; its size depends on the design and overall wainscot height. | Top rail or chair rail, saw, level, adhesive, and finish nails. | Fit corners carefully and use a consistent top line. A chair rail is optional; the upper edge can also use a simpler cap or trim profile. |
| Filling and painting | Fill nail holes and small gaps, sand smooth, caulk appropriate joints, then prime and paint. | Allow filler, caulk, primer, and paint to dry according to their product instructions before applying the next coat. | Paintable caulk, filler, sandpaper, primer, paint, brushes, and rollers. | Use materials suited to the panel substrate and room conditions. In bathrooms or other humid areas, choose moisture-appropriate materials and maintain effective ventilation. |
Note: Dimensions are general planning ranges, not fixed standards. Confirm measurements, material requirements, and fastening instructions for the specific wall and products being used.
Flat panel wainscoting is often used in hallways, dining rooms, bedrooms, and living areas. Its clean, rectangular panels add visual structure without ornate detailing. In a narrow hallway, a painted lower wall can make scuffs less noticeable; in a dining room, the panels can help define the space. Choose a finish that suits the room’s use. Satin or semi-gloss paint is generally easier to wipe than a flat finish, though it may show surface flaws more clearly. Wainscoting is not waterproof, so rooms with frequent splashes need careful material and finish choices. That detail is easy to overlook.
For routine care, dust the panels with a soft cloth or vacuum brush. Wipe marks with a damp cloth and a little mild soap, then dry the surface. Keep water minimal. Avoid abrasive pads, which can dull paint or scratch the finish. Check seams and corners occasionally for lifting paint or cracked caulk, especially near sinks or exterior doors. Small repairs are easier before moisture reaches the wall behind the panels. Strong cleaners are rarely needed, despite how tempting they can seem on a stubborn mark. Test any cleaning method in a discreet spot first; paint finishes vary, and a patch can look different after drying.